
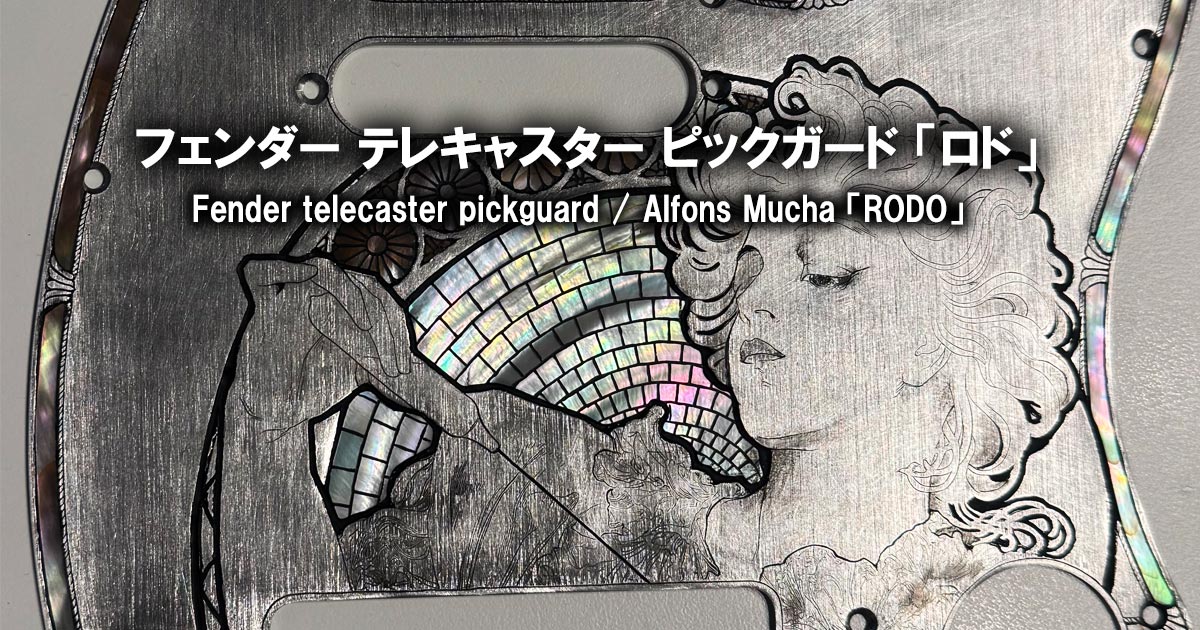

Considerations on Design Layout and Borders
デザイン配置と枠の考察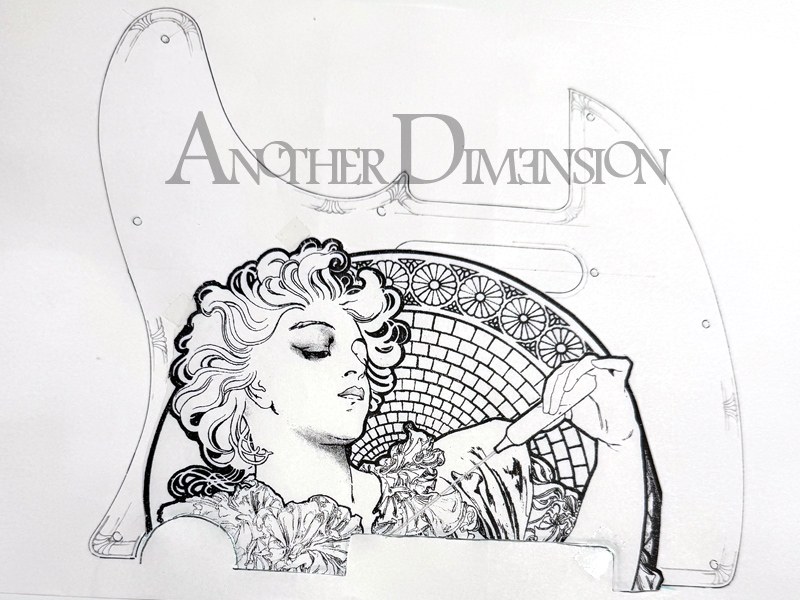
今回はテレキャスターのピックガードへ彫金です、インレイの実験も兼ねたプロトタイプの為、
崇拝するミュシャ様のデザインを使用させていただきました(デザインを考える時間と余裕がありませんでした、、、)。
色々と物色した結果、「RODO」がピッタリとはまったので決定、で、外枠のみ雰囲気に合わせてデザインをしました。
この時点ではどの部分に貝を入れるかは決めていませんでしたが、
非常に面倒なデザインを選定してしまった事に後悔するのはもう少し先になります。。。
English translation
This time, I’m engraving a Telecaster pickguard. Since this is a prototype that also serves as an experiment with inlays,
I decided to use a design by Alphonse Mucha—an artist I deeply admire (to be honest, I simply didn’t have the time or the breathing room to come up with a design of my own...).
After looking through various options, I settled on "RODO," which fit the piece perfectly; I then designed the outer border to complement the overall aesthetic.
At this stage, I hadn’t yet decided where to incorporate the shell inlays—though it wouldn’t be long before I came to regret choosing such an incredibly tedious design...
Scribing, recessing, and surface leveling
すじ彫り、段落とし、地均し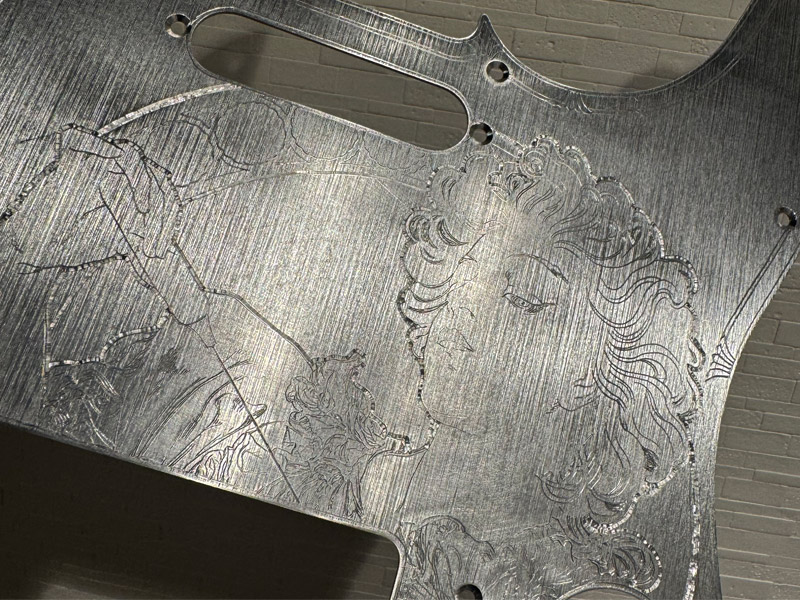
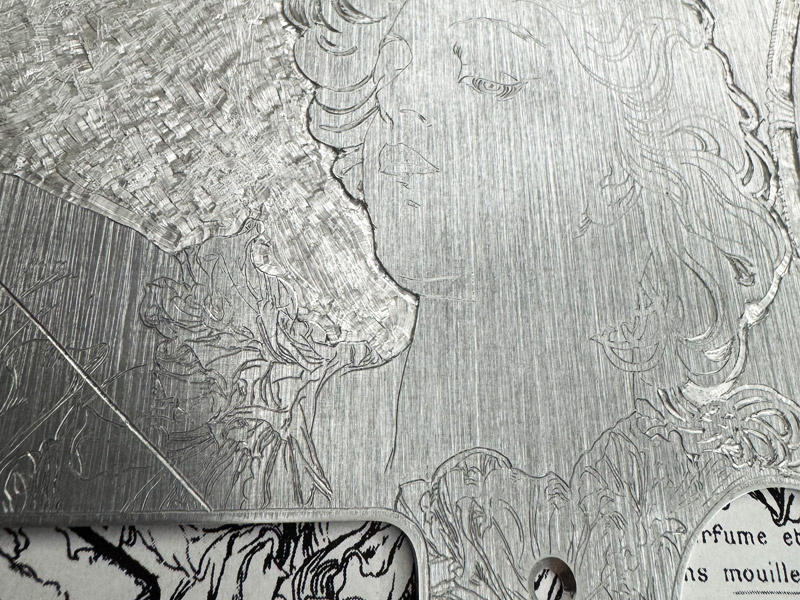
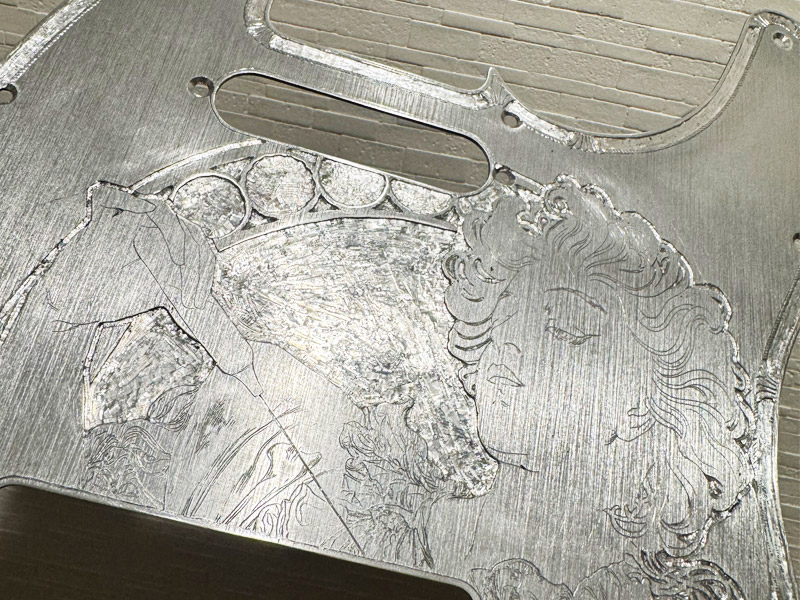
まずはいつもの流れで、すじ彫り、インレイ部分の段を落として、地均し、
書くと簡単ですがかなりの時間を要しました。
今回のアルミプレートは約1mm、貝の厚みが約0.4-0.7mm、接着剤も挟みますのでギリギリです。
面積の大きな貝は完全なフラットではなく若干湾曲している物もあるので彫りは深めに準備をしておく必要があります。
English translation
As is standard procedure, I began by carving the recesses, lowering the level for the inlays, and leveling the surface—a process that sounds simple but actually required a significant amount of time.
The aluminum plate is about 1mm thick, and the shell pieces range from approximately 0.4mm to 0.7mm in thickness; once the adhesive is factored in, the tolerances are extremely tight.
Since larger pieces of shell are not perfectly flat—often possessing a slight curvature—it is necessary to carve the recesses somewhat deeper to accommodate them.
Shell processing, trial fitting, bonding, and carving
貝の加工、仮合わせ、接着、彫刻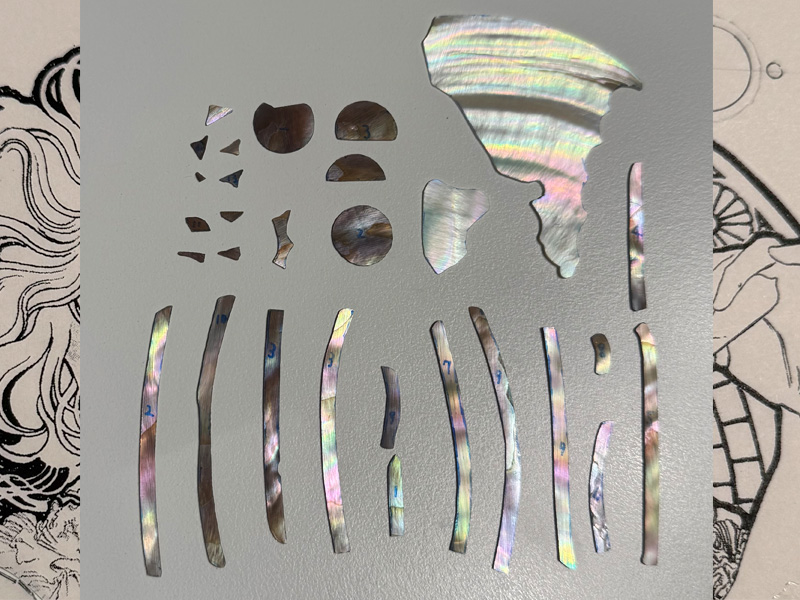
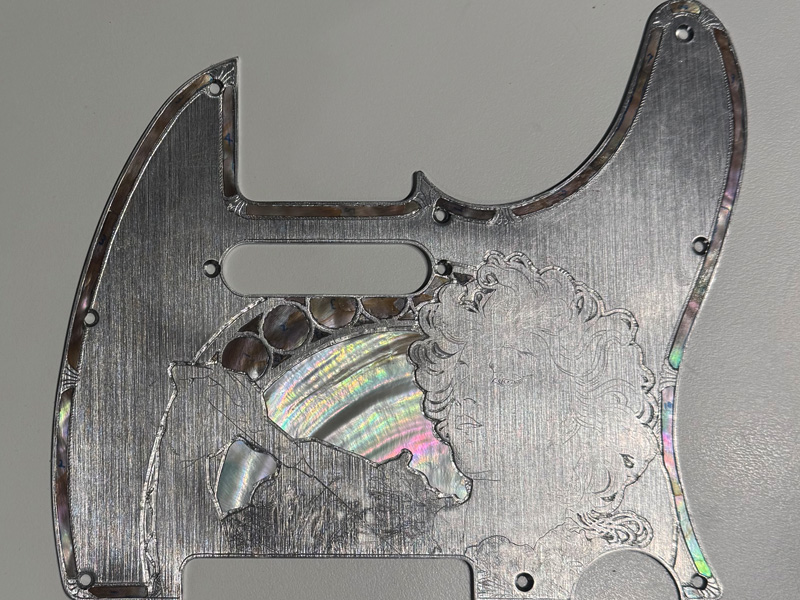
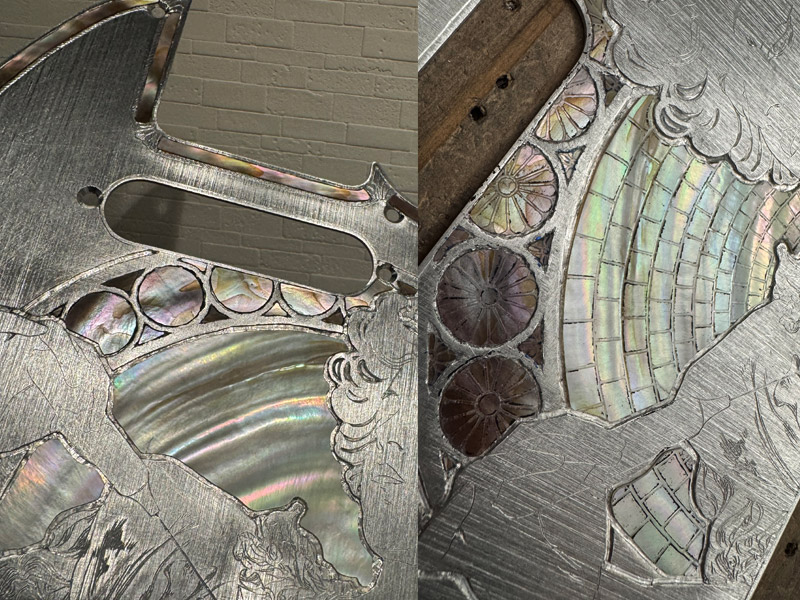
今回はここからが大変です、貝の選定はプロトタイプなので極上ではないですが
上からの彫刻もありアバロンは強烈すぎるので、ホワイトパール系で、白蝶貝、夜光貝、でまとめました、
今回の貝は全部で29パーツ、糸鋸で切り出して鑢で整えました、位置、高さの仮合わせを入念に行い、接着します。
通常、指板やヘッドのインレイはエポキシで派手に埋めていきますが、
今回は墨入れを控えているので接着剤のはみ出しNG、という事もあり多用途接着剤で留めていきます。
48時間の硬化を待ち、貝の部分に彫刻を施していきます(様々なタガネでの線の実験を行いました)。
English translation
This is where things get challenging. Since this is a prototype, the shell material isn’t the absolute finest grade; I’ve opted for white mother-of-pearl and noctilucent shell rather than abalone, which would be too visually intense—especially since there will be additional engraving on top.
The shell components consist of 29 individual pieces, all cut out with a jeweler’s saw and refined with files. I’ve carefully test-fitted each piece for position and height before proceeding to glue them in place.
Typically, inlays for fretboards or headstocks are set using epoxy, which often fills the surrounding gaps. However, since I’m avoiding the use of a dark filler (like sumi ink) to highlight the lines, I cannot afford any adhesive squeeze-out; therefore, I am using a multi-purpose adhesive instead.
Once the glue has cured for 48 hours, I will begin engraving the shell pieces—a process for which I’ve already experimented with various chisels to achieve the desired line work.
Inking, coloring, finishing, completion
墨入れ、色付け、仕上げ、完成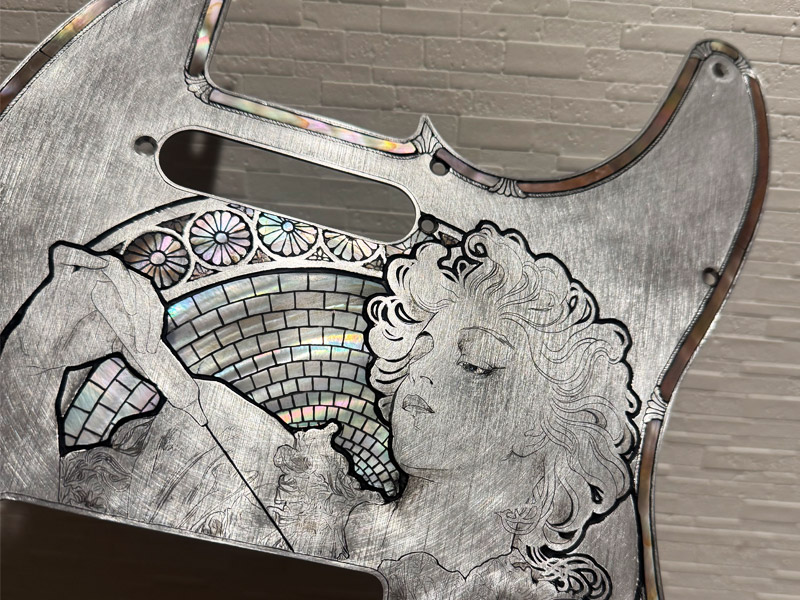
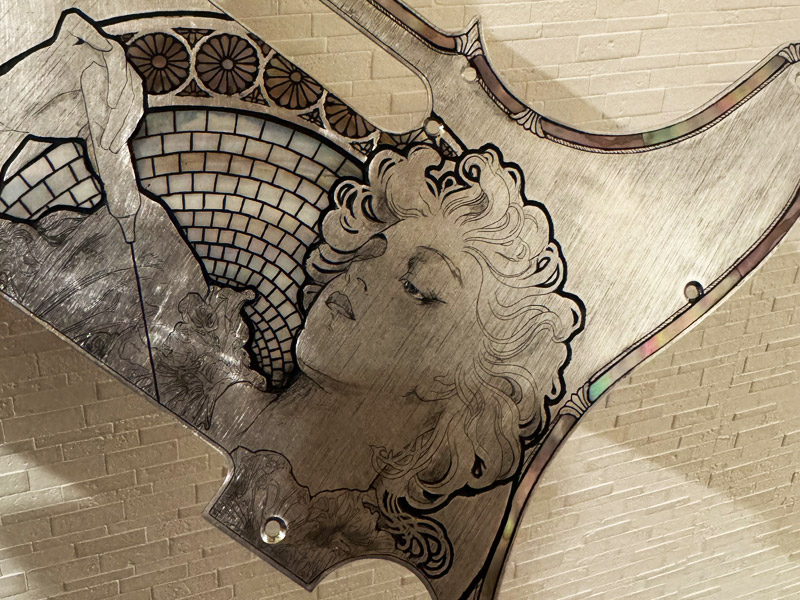
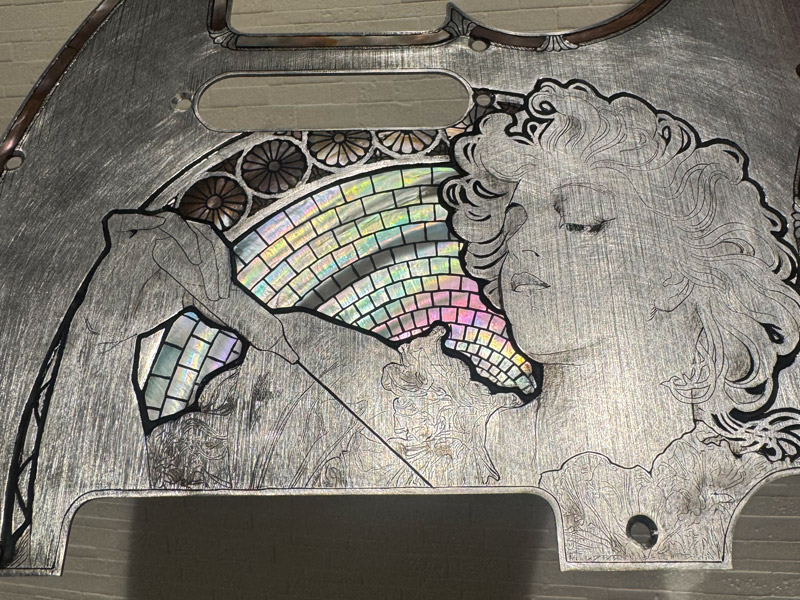
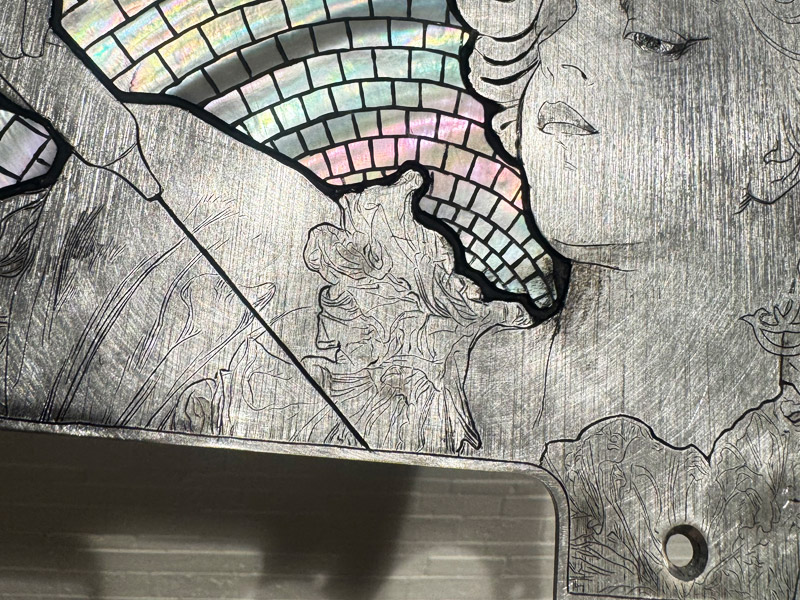
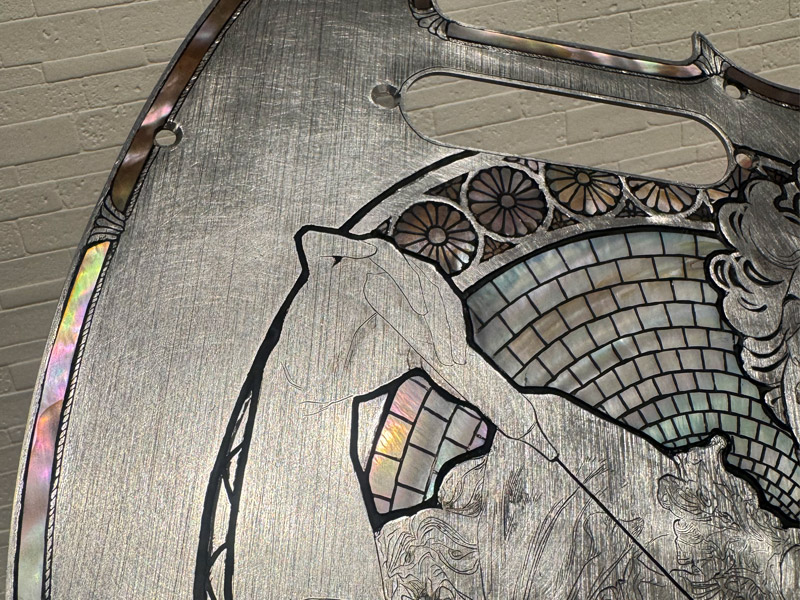
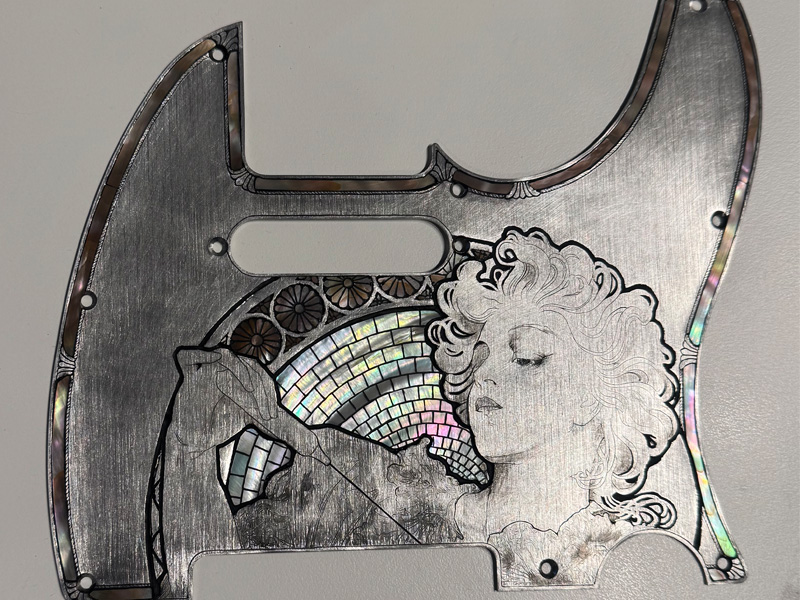
いよいよラストスパートです、
今回は溝にしっかりとインクを充填させる必要があった為、原液で墨入れを行いました、
かなり細い線もある為、手のみで6時間かけて400番のサンドペーパーで削り出し、全体をアンティーク調にボカシて軽く色付けしました。
貝の部分のみ2500番で磨き軽く光沢を出してようやく完成です、
課題は山のようにありますが一先ず形には成ったかと思います、一部に布目象嵌を入れる予定でしたが
作業の順番を間違えてしまい断念しました、来年のゼマイティスでリベンジしたいと思います。
English translation
Now for the final stretch.
Since the grooves required a thorough filling of ink, I applied the ink in its undiluted, concentrated form.
Because some of the lines are extremely fine, I spent six hours hand-sanding the entire piece with 400-grit sandpaper, creating an antique-style, blended finish with a subtle touch of color.
Finally, I polished only the shell inlays with 2500-grit sandpaper to bring out a soft luster—and with that, it’s complete.
While there are still countless issues to address, I’m pleased that it has at least taken shape. I had originally planned to incorporate some fabric-pattern inlays, but I miscalculated the sequence of steps and had to abandon that idea; I’ll aim to get it right next year on the Zemaitis project.