Design Considerations.
デザインの検討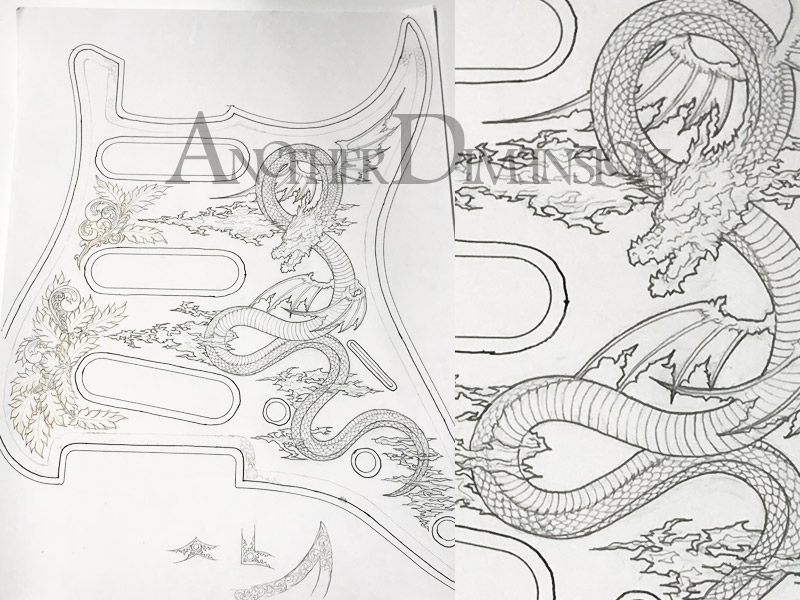
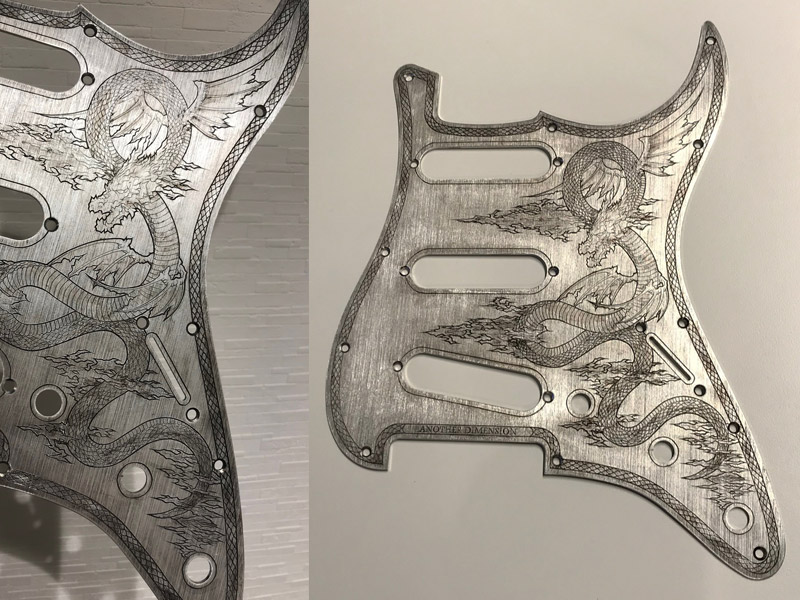
今回は フェンダーストラトキャスター 3S 最もポピュラーなピックガードへ彫金です、
もう少し和風な仕上がりを想定していましたが空間を埋めるために翼などを書き足していくにつれ
洋風な雰囲気となってしまいました。。。
ゼマイティスに倣って植物も同居予定でデザインは行いましたが今回は龍のみとしました、
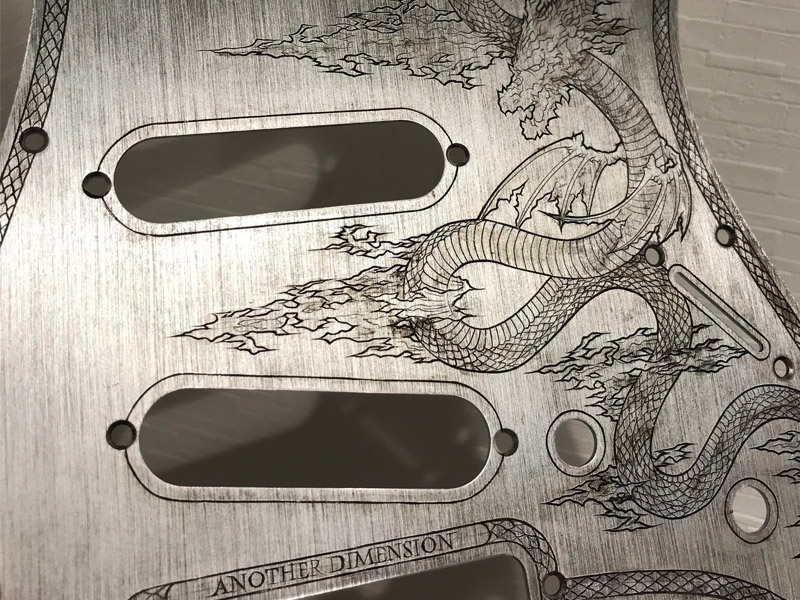
枠に関しても統一感を優先してリーフ柄ではなく鱗を入れてみることとしました、
鱗の接合部の処理に関しては蝶番など幾つかデザイン案を検討しましたがあえてシンプルに繋ぎました。
English translation
This time, I'm engraving the most popular pickguard for a Fender Stratocaster 3s guitar.
I was aiming for a more Japanese-style finish, but as I added wings and other details to fill the space, it ended up with a more Western feel.
I designed it with the intention of including plants, similar to Zemaitis, but this time I only included a dragon.
I also prioritized unity for the frame, deciding to use scales rather than a leaf pattern.
I considered several design ideas for the joints between the scales, including hinges, but decided to keep it simple.
Layout preparation and engraving.
レイアウトの準備とすじ彫り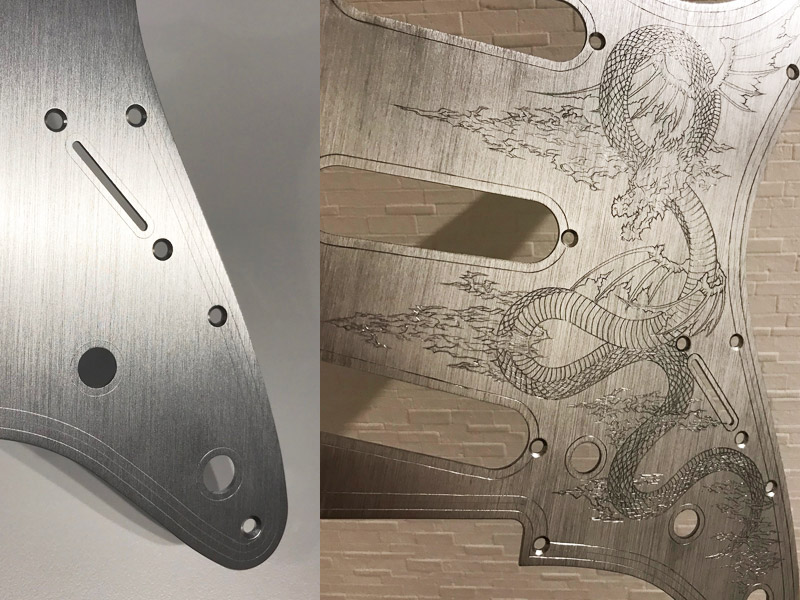
まずはカニコンパスで枠のライン取り、パーツ穴の周りのラインを決めていきます、
今回の素材は縦のヘアラインがかなり深いので流されないように注意して作業を行います。
メインモチーフの位置を正確に決めてすじ彫りを進めていきます。
English translation
First, use a crab compass to mark the lines of the frame and the lines around the holes in the parts.
The material in question has quite deep vertical hairlines, so work carefully to avoid them being washed away.
Once the position of the main motif is accurately determined, proceed with the engraving.
Scale design and overall revisions.
鱗のデザインと全体の修正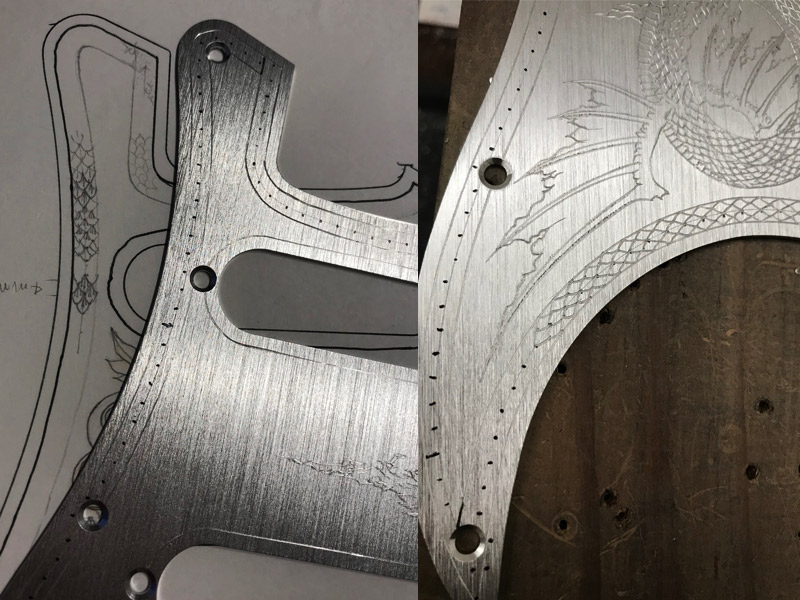
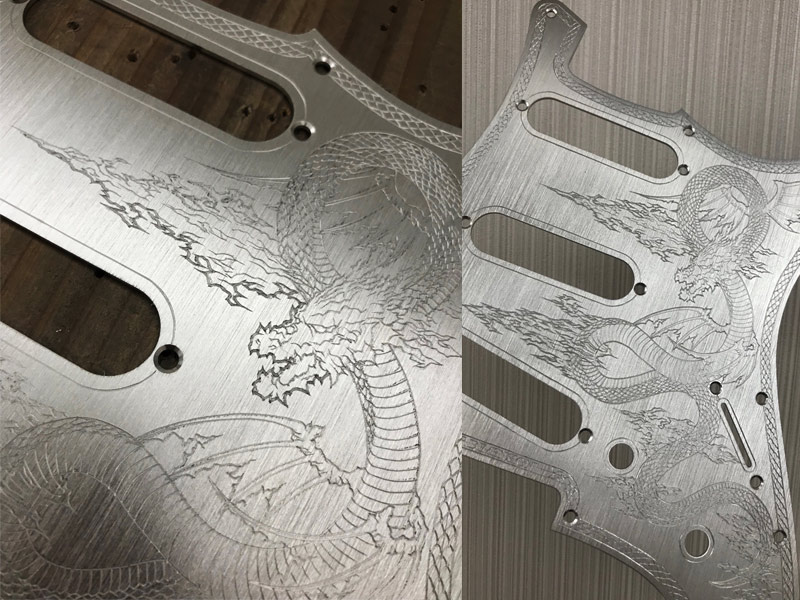
次に枠の鱗を仕上げていきます、ここは下書き無しで均等な幅だけを意識して1枚ずつ彫っていきます。
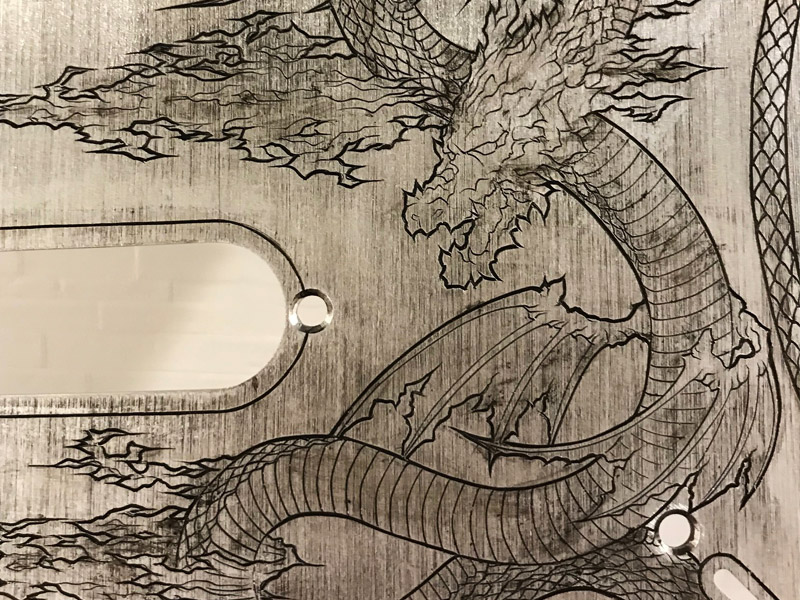
全体のすじ彫りが終了したら雲竜のアウトラインを太く彫りなおして細かな線の先端を尖らせて調整します、
最後に全体を見直して線の強弱やバランスを修正して彫りパートは完成です。
English translation
Next, we'll finish the scales around the frame. Here, we don't make any rough sketches, but engrave each one individually, focusing only on an even width.
Once the overall lines are engraved, we'll re-engrave the outline of the cloud dragon thicker and sharpen the tips of the fine lines to make adjustments.
Finally, we'll look over the whole thing and adjust the strength and balance of the lines, and the engraving part will be complete.
Inking and shadow adjustment.
墨入れと影の調整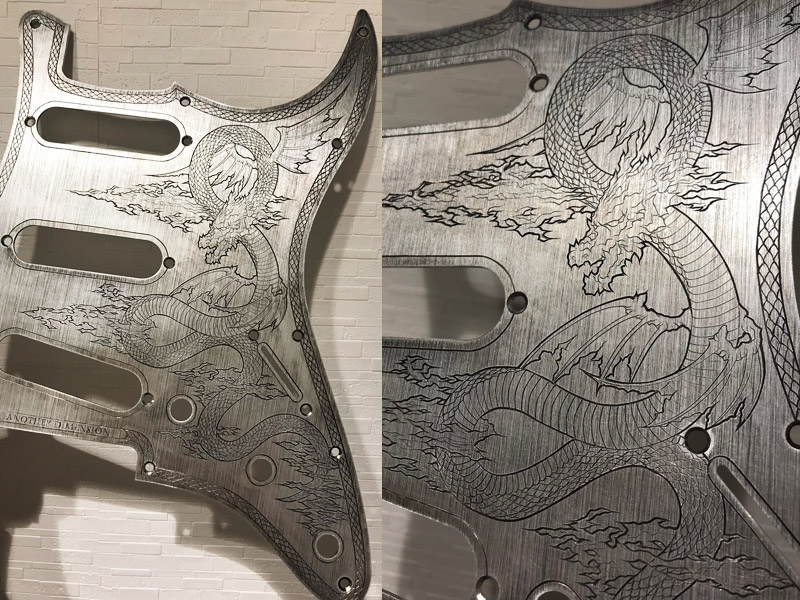
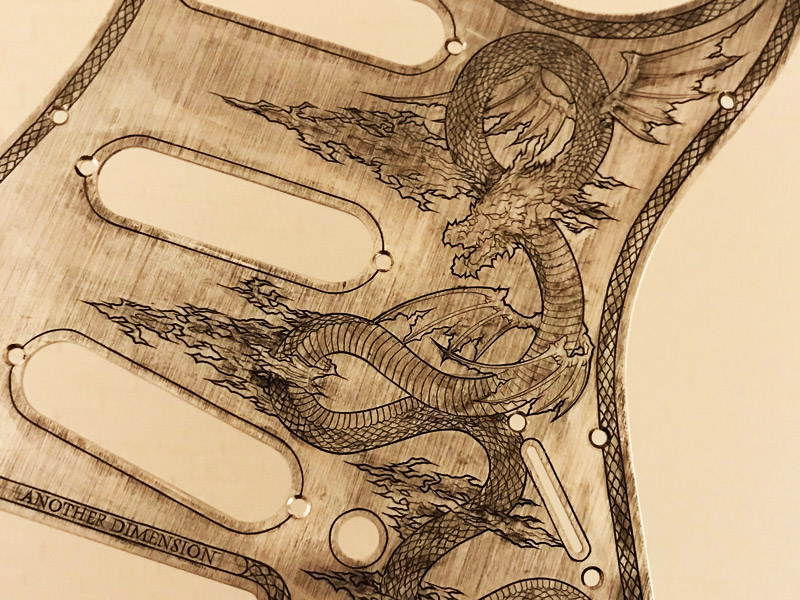
サンドペーパーで表面を整えて墨入れに入ります、今回は薄めた塗料を数回に分けて乾燥を繰り返して入れました、
ラインの墨入れ完了後に簡単な影の調整とエイジング風の汚し、鱗部分の濃淡を調整しました、
好みのバランスになるまで塗って乾燥、削りを繰り返して仕上げていきます、
鱗はグレー、ダークグレーに加えて粗目のペーパーでハイライトを作って3カラーで雰囲気を出しました、
これで今回は完成とします、ストラトに装着した画像はそのうち追加したいと思います。。。
English translation
I smoothed the surface with sandpaper and then moved on to inking. This time, I applied diluted paint in several coats, letting it dry repeatedly.
After completing the inking of the lines, I made some simple adjustments to the shadows, added some aged dirt, and adjusted the shading of the scales.
I continued painting, letting it dry, and sanding until I achieved the desired balance.
I used gray and dark gray for the scales, and added highlights with coarse sandpaper to create a three-color look.
This completes it for now. I'll add a picture of it attached to a Stratocaster sometime soon…
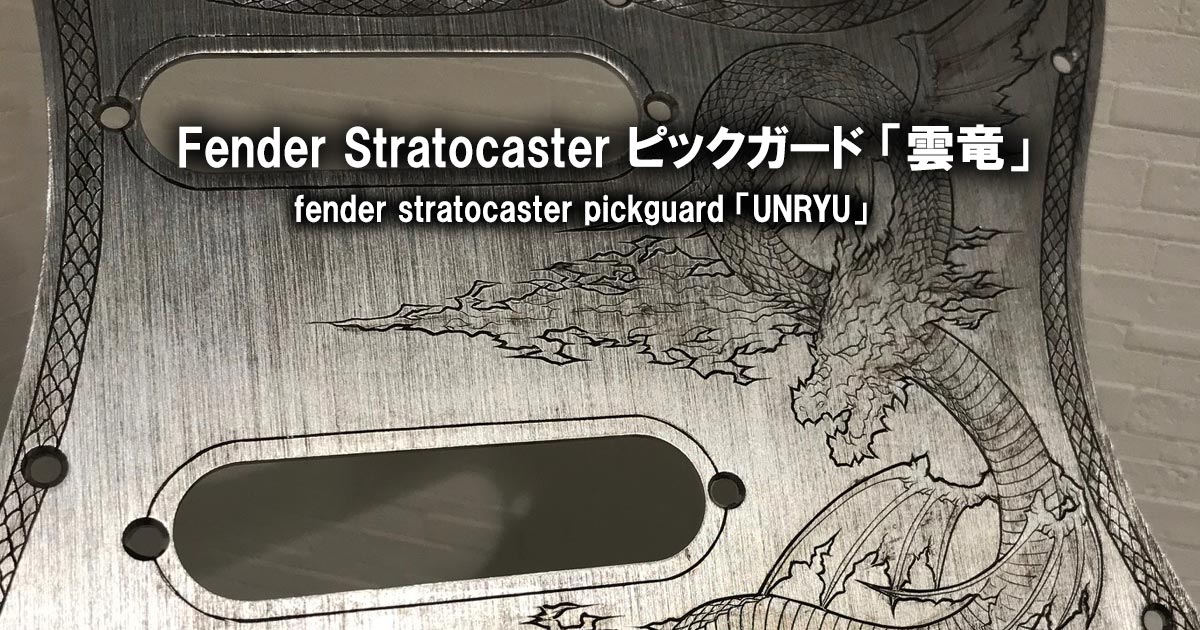
Finished image.
完成画像